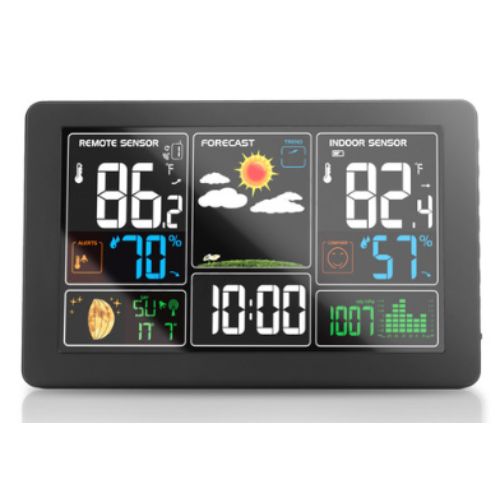
This page covers the black KALEVOL color-display weather station originally linked here as Amazon ASIN B09GLT1WL2. Its exact model number and hardware revision have not been verified. Check the label on your display and outdoor sensor before using a KALEVOL manual or ordering a replacement part.
The original listing could not be retrieved during our September 2026 review. Related KALEVOL listings do not establish that their instructions apply to this unit. This is a research-based review and owner checklist, not a hands-on test or a verified factory-reset guide.
Which KALEVOL station is this?
The retained product image shows a black display with remote readings on the left, indoor readings on the right, forecast graphics in the center and a clock below. The earlier article described a package containing a display, DC adapter and one remote sensor. That does not mean three sensors were supplied.

Look for a model or part number on the rear label, battery compartment, original box or order record. Record the outdoor sensor’s identifier separately. KALEVOL has used multiple product names and packages; a similar screen is not enough to confirm compatibility.
What the display can—and cannot—tell you
The pictured display presents indoor and remote temperature and humidity, plus clock, forecast and pressure information. These are different kinds of information: a temperature reading describes conditions at a sensor, while a forecast symbol is an estimate of future conditions.
Do not read a rain icon as measured rainfall. We have not established rain-gauge or wind-measuring hardware for this package. Nor have we verified Wi-Fi, an app or internet weather uploads. A wireless sensor connection and radio-controlled clock do not themselves provide internet connectivity.
The earlier claims that this station could ensure an event avoided rain or prevent weather from disrupting travel were unsupported. A consumer forecast is an estimate based on available observations and its forecasting method—not a guarantee. Use official forecasts and warnings when planning outdoor activities; see the National Weather Service’s preparation guidance.
Before resetting or replacing the outdoor sensor
These are general diagnostic checks, not an exact KALEVOL reset sequence:
- Identify both units. Match the display and sensor labels to the instructions supplied with your package. Do not borrow a button sequence solely because another KALEVOL station looks similar.
- Check power. Follow the battery types and polarity marked on each unit. Check for exhausted batteries and use the correct original adapter where applicable.
- Check the selected channel. If your hardware has channel controls, compare the selected display channel with the sensor setting and your manual. Channel capacity does not mean additional sensors were included.
- Check location. Bring the units closer for diagnosis before assuming the sensor has failed. Walls and other obstructions can limit a radio connection. An advertised open-area range is not a guaranteed indoor distance.
- Check the measurement location. Avoid direct sun and artificial heat affecting temperature readings. Use our sensor siting checklist for placement principles, and your model’s instructions for weather-exposure limits.
We have not verified the old article’s ten-minute power-removal procedure against an exact manual. Do not treat that sequence as a universal KALEVOL reset. Find the matching instructions before clearing settings or attempting a factory reset.
Clock and backlight checks
A radio-controlled clock receives a time signal; it does not detect your location automatically. For a WWVB-equipped model, check the time-zone and daylight-saving settings in its own manual. NIST recommends trying a different orientation or window location and keeping the receiver away from interfering electronics when reception fails.
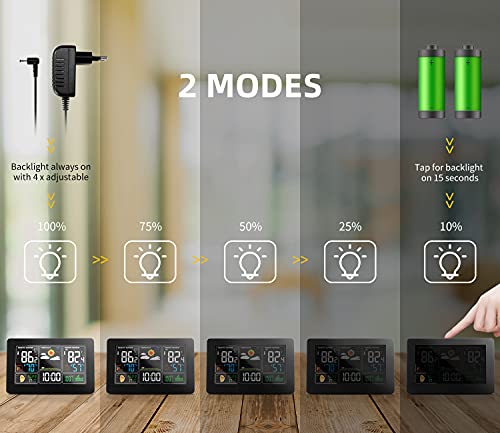
The original promotional image distinguishes adapter-powered illumination from a brief battery-powered backlight. Check the power source and brightness control before assuming a dark screen is defective. We have not confirmed the exact brightness steps or clock-reception blackout timing for every revision. The graphic is not a battery-size or replacement-adapter specification.
Manual, support and replacement parts
An exact compatible replacement sensor has not been verified for the package originally linked here. Do not buy a sensor based only on appearance, brand or radio frequency.
Start with your original order and supplied instructions. Ask the seller for a manual and sensor part number matching both unit labels. The KALEVOL website was not serving a working support site when checked, and the related Amazon products inspected were unavailable. That does not establish that the brand or your model has been discontinued.
If you need wind, rainfall or remote monitoring
The old article also illustrated an Ambient WS-2902-series station. That is a different type of system, not a replacement KALEVOL sensor.
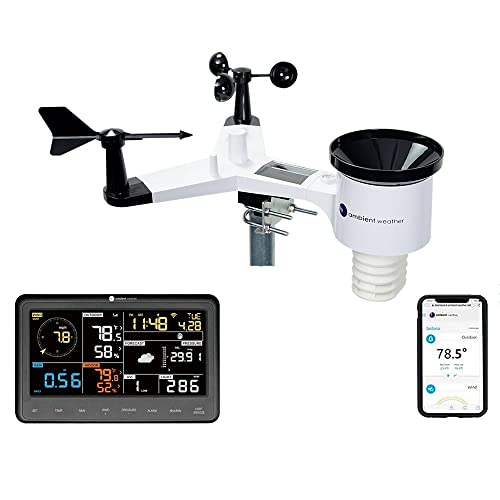
If those additional measurements are your goal, our Ambient WS-2902 review separates current buyer options from older generations. If you only need to restore your existing display, identify its model and troubleshoot that equipment first.