
The Smart Gear STG-5939-KB is the white indoor/outdoor weather station covered by this guide. If you already own one, start with the model check and original manual below, then choose the help that matches your problem.
These instructions apply to STG-5939-KB, not every product sold under the Smart Gear name. Check the model marking on your unit or packaging before following them. If the number differs, request the instructions for that exact model from JLR Gear.
Original Smart Gear manual
Open the original STG-5939-KB instruction manual (PDF), hosted by JLR Gear. Its product page identifies the model and links to the same document.
The PDF includes control diagrams and the manufacturer’s setup and troubleshooting instructions. This page is a documentation-based owner resource; it does not report hands-on testing.
Does this Smart Gear weather station use Wi-Fi?
“Wireless” here means a 433 MHz sensor link, not Wi-Fi. Router setup instructions do not apply to this model.
Do not use another Smart Gear model’s internet-connection instructions just because its brand name matches. If you are trying to reconnect a different device to a router, identify that model first.
Initial setup and outdoor-sensor pairing
- Power the console with its supplied 5V adapter; battery operation uses 3 AAA cells.
- Keep the transmitter within 10 feet initially. Insert 2 AA batteries with correct polarity; confirm channel 1.
- Allow three minutes for an outdoor reading.
Outdoor sensor not connecting: retry and re-pair
If setup fails, the manual says to disconnect the adapter, remove both units’ batteries and repeat setup. If still unsuccessful, hold the transmitter’s TX button for three seconds, then the console’s CH button for 3–5 seconds to search.
Before disconnecting power, note any settings you want to check afterward. That is a precaution, not a claim that every setting is erased. This procedure is a power/setup retry; do not treat it as a documented universal Smart Gear factory reset.
For replacement batteries, follow the sizes above, observe polarity and avoid mixing old/new cells or battery types.
Sensor placement and operating range
Mount the transmitter vertically, shaded and sheltered, at least six feet high. It is water-resistant, not waterproof. 200 feet is the manufacturer’s open-air maximum; obstacles reduce range.
A setup-distance instruction is not evidence of a ten-foot operating limit. If you are comparing readings from different locations, consider where each sensor is placed before deciding that one is faulty. For broader context, see our outdoor thermometer guide.
Display, backlight and USB power
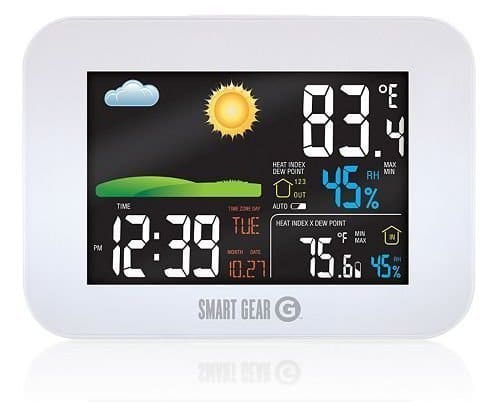
On batteries, SNOOZE/LIGHT illuminates the screen for eight seconds. Continuous backlighting requires adapter power. USB charging also requires the adapter; output is limited to 1 amp.
A dark screen between button presses is therefore not, by itself, proof that the display has failed. Likewise, avoid assuming that a USB socket can power every device. Check the device’s power requirements before connecting it.
What the forecast icons mean
The forecast uses pressure changes for the next 12 hours, rather than an internet forecast. Icons are predictions, not guaranteed current conditions.
Use an official local forecast or warning service for decisions where weather safety matters. A household display should not be your only source of weather information.
The operating details above are summarized from the original manufacturer manual. Consult its diagrams for button locations and its remaining sections for clock, alarm and other controls.
Can I buy a replacement outdoor sensor?
We have not verified an exact compatible replacement sensor currently available to purchase for the STG-5939-KB. A similar-looking sensor or matching radio frequency is not enough evidence of compatibility.
Contact JLR Gear with the console model and any identifying information on your existing transmitter. Ask them to confirm the replacement part number and compatibility before buying. Photographs of the labels can help explain which equipment you have.
There is also no verified basis here for declaring the entire product discontinued. JLR Gear still hosts its product page and manual; an available document does not establish current production or replacement-part stock.
Manufacturer support and further reading
JLR Gear customer support lists customerservice@jlrgear.com and 1-800-254-0111. Include the model number, what the screen shows, which part is not working and the troubleshooting steps already tried. Support response times and spare-part availability have not been verified.
This page remains focused on helping owners use their existing equipment. For separate background reading, explore our indoor weather station guide or weather station reviews.