As an Amazon Associate I earn from qualifying purchases. If you buy through links on this page, I may earn a commission at no extra cost to you.
Ecowitt weather readings can reach Home Assistant locally, but there are two different integration paths. Home Assistant’s built-in Ecowitt integration receives uploads from your receiver. Ecowitt’s separate custom integration polls a supported receiver’s local API. Instructions for one are not interchangeable with the other.
Start with the model printed on your gateway or display console—not just the name of the outdoor sensor. This guide is based on manufacturer documentation and integration sources, not hands-on testing. If you are still choosing between weather ecosystems, use our Home Automation buying guide.
Identify your hardware before configuring Home Assistant
In the table, Core push means the built-in Home Assistant integration. Ecowitt polling means the manufacturer’s separately installed ha_ecowitt_iot integration. Both weather-data paths are local; optional cloud uploads are separate.
| Hardware you have | Component connecting to Home Assistant | Documented path and limitation |
|---|---|---|
| GW2000, GW1200 or GW3000 gateway | The gateway | Core push or Ecowitt polling. Check firmware and support for the individual sensors you use. |
| GW2001 Wittboy package | Its GW2000 gateway | Same two paths; GW2001 names the package containing GW2000 and standard WS90. |
| GW1100 | The gateway | Both paths are listed by Ecowitt; its polling table excludes IoT-device support for this model. Weather measurements are not the same as actuator control. |
| HP2551-family package with HP2550 console | The HP2550 receiver | Core push is listed; Ecowitt’s polling integration does not list this console as supported. Confirm the console label. |
| Standard RF WS90 or WS85 by itself | A compatible receiver is still needed | The array is not a network gateway. Receiver compatibility and matching radio frequency matter. |
| WS90 “Powered by Shelly” | A different Bluetooth/Zigbee arrangement | Not compatible with Ecowitt gateways/consoles; neither receiver-based recipe below applies directly. |
Sources: Ecowitt’s integration compatibility tables, GW2001 package, HP2551/HP2550 documentation, WS85, and Shelly variant distinction.
This is a focused selection, not a complete compatibility list. A receiver accepting a sensor does not establish that every field or control is exposed by both integrations.
Understand the two local connections
Your standard outdoor sensor sends radio measurements to an Ecowitt receiver. The receiver then uses Ethernet or Wi-Fi to join your home network. Home Assistant communicates with that receiver; it does not independently pair with every outdoor sensor. The GW2000 manual distinguishes these radio and network functions.
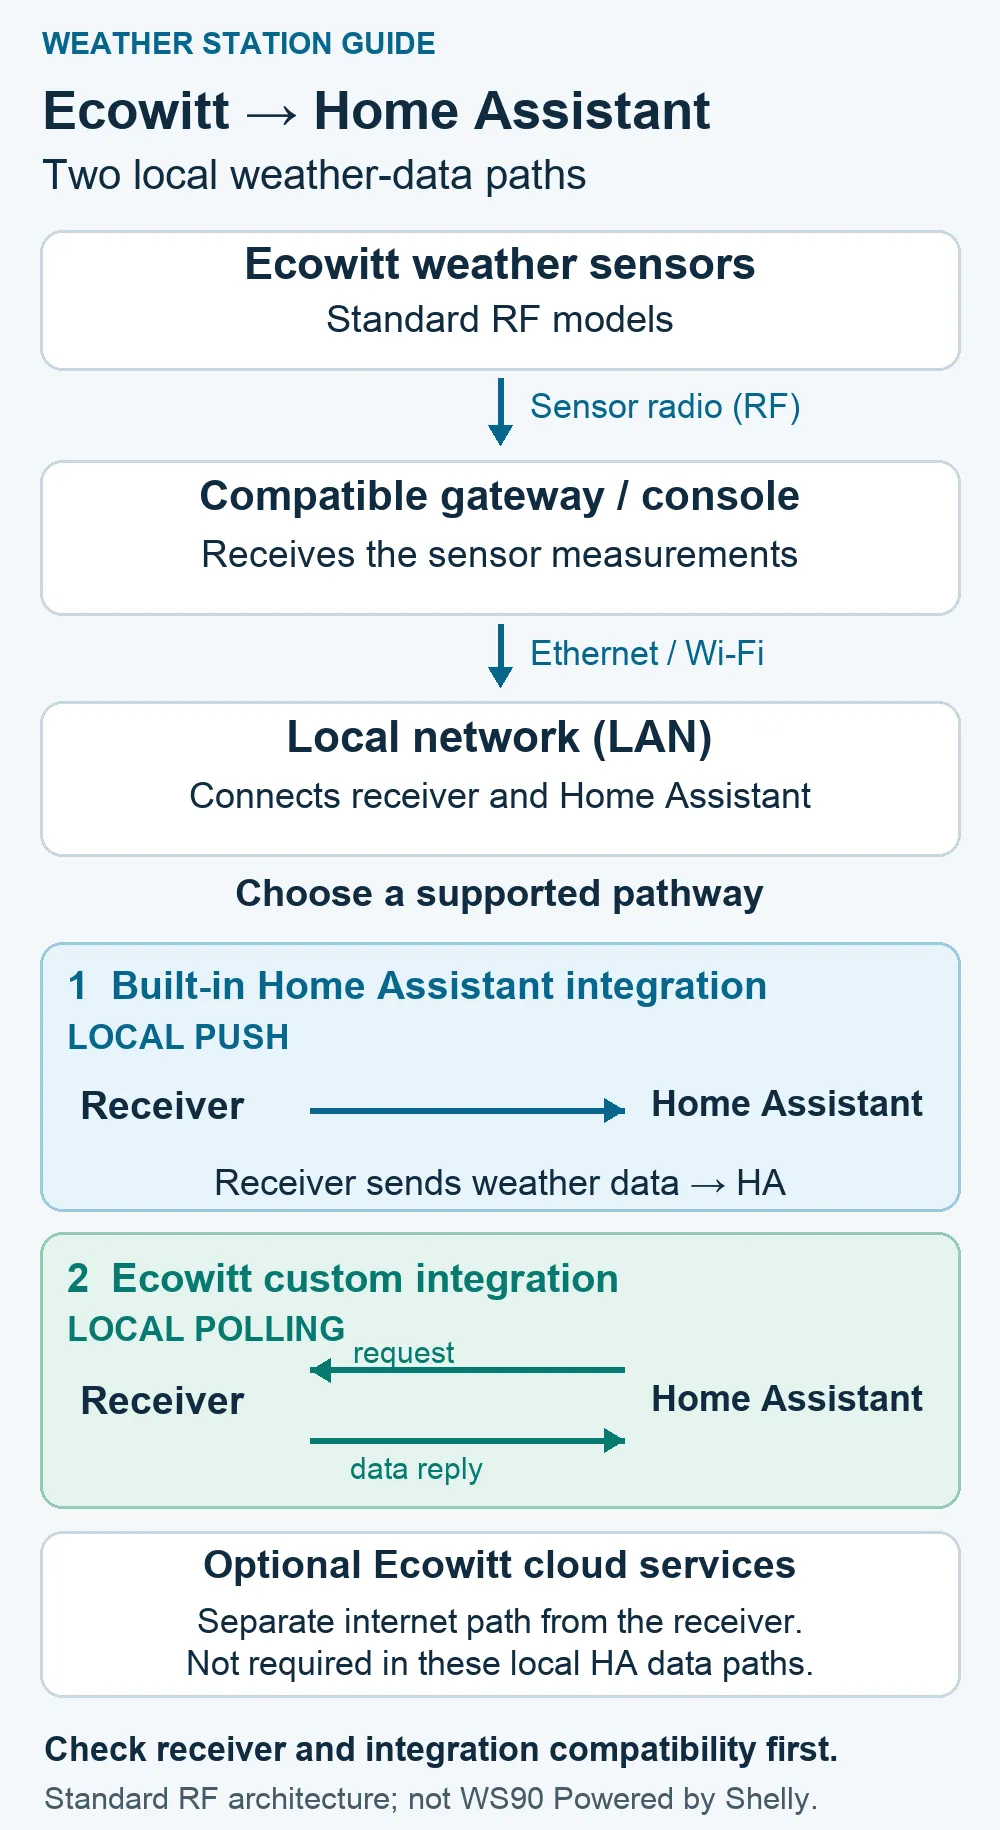
Core push: the receiver initiates delivery to a Home Assistant callback. Choose this when you want the built-in integration and have a suitable local HTTP endpoint, or when your receiver is unsupported by the polling alternative.
Ecowitt polling: Home Assistant initiates requests to the receiver. It avoids configuring the Core upload callback, but requires a compatible receiver and a separately maintained custom component. “Official” in its name means Ecowitt-maintained, not included in Home Assistant Core. Its manifest identifies it as local polling.
If a working installation already meets your needs, neither path is a reason to migrate automatically. Identify older community components by their repository, not simply the word “Ecowitt” or “HACS.”
Set up the built-in Core push path
- Confirm that the receiver already shows its sensor readings and is on your network.
- Add Ecowitt through Home Assistant’s Devices & services settings. Record the host, port and callback path it supplies.
- In the receiver’s custom-upload settings, enable the Ecowitt protocol and enter the appropriate local destination. Save it and allow an upload to arrive before checking entities.
Follow Home Assistant’s current setup instructions for your interface. The app adds a leading slash to the path; the documentation explains how to avoid duplicating it. Its supported embedded-web setup can avoid an Ecowitt account; app setup requires one.
The upload uses HTTP. If Home Assistant accepts only HTTPS, use a supported local arrangement rather than exposing an unencrypted service to the internet. Keep external HTTPS protection intact.
Do not paste an example webhook from a tutorial. Home Assistant generates a new identifier during setup. The Core configuration source also derives the suggested host/port from its configured URL. If the suggestion is a remote address, confirm the correct reachable local endpoint instead of assuming the suggestion suits your network. The port must match the actual listener—not an arbitrary number copied from a proxy guide.
Set up Ecowitt’s polling path
First check your receiver against the manufacturer’s table. Follow the repository’s installation instructions for Ecowitt Official Integration, then configure the receiver’s local address. This is a custom integration; installing the Core integration does not install it. Manufacturer instructions
This path tests connectivity by requesting receiver information. Its configuration source takes a host address and reports connection failures; it does not ask you to create a Core webhook. Do not enter Home Assistant’s address where this method expects the gateway’s address.
The integration’s weather-data connection is local, without Ecowitt cloud credentials in this configuration. Initial receiver provisioning is a separate task. Local API access does not mean the device has no optional internet functions.
Troubleshoot in order
The following sequence combines documented prerequisites with network reasoning. The network checks are diagnostic guidance, not a claim that we reproduced every failure on physical hardware.
1. Check the receiver before Home Assistant
Open the receiver’s live-data view. If the missing measurement is absent there too, concentrate on sensor power, reception, frequency and the receiver’s sensor configuration. Changing HA integrations cannot repair a radio link that never reaches the gateway.
On GW2000, the sensor-link indicator and live-data/sensor-ID screens help separate reception from weather-server status. Do not interpret successful cloud upload as proof of successful HA delivery. Use the model’s manual; avoid borrowing reset instructions from a different console.
2. Check both addresses and the required direction
For Core push, the gateway must reach Home Assistant’s endpoint. For polling, Home Assistant must reach the gateway. A phone opening both interfaces proves only the phone’s access, not necessarily communication between those two devices.
Guest Wi-Fi can isolate clients. Separate VLANs or subnets can work, but require routing and rules allowing the relevant connection and replies. Different Wi-Fi names alone do not establish isolation, and matching Wi-Fi names do not prove unrestricted access.
If filtering is involved, allow the necessary traffic between the identified devices rather than disabling the firewall or opening the service publicly. Check the router’s current address assignment if equipment was replaced or restarted. A DHCP reservation can keep an address predictable; it does not fix a wrong protocol or path.
3. Check the settings for your chosen path
| Core push | Ecowitt polling |
|---|---|
| Upload enabled; Ecowitt protocol selected | Supported receiver/local API |
| Reachable HA host and actual listener port | Correct receiver host address |
| Current callback, including correct slash handling | Successful local connection/configuration |
| HTTP route compatible with the receiver | No Core callback required |
Before changing anything, save the existing settings. Repeatedly deleting and recreating entries can make diagnosis harder. A Home Assistant community thread records owners using outdated callback details or checking before data appeared. These are reported patterns, not proof that waiting or restarting fixes every case.
4. Separate missing entities from missing measurements
If nothing appears, return to transport and integration identification. If other readings work, compare the missing sensor with the receiver’s live data and the integration’s supported fields. Confirm whether the entity is disabled or simply named differently before buying replacement hardware.
Do not expect WS85 to supply every WS90 measurement: WS85 is a rain/wind array. Nor does gateway expansion support mean an optional soil or air-quality sensor is included. Compare like-for-like values—rain rate versus accumulated rain, or indoor versus outdoor temperature.
An old custom-component failure is not automatically a Core failure. The 2025 issue discussion includes a custom-component import error alongside other reports. Record your integration repository, HA version and receiver firmware before looking for a matching issue.
5. Check freshness without assuming a fixed interval
Sensor transmissions, custom-upload cadence, polling and history recording are different stages. A repeated value may simply mean the measurement has not changed; a visible value is not proof that fresh data is still arriving.
Compare receiver readings with HA’s available diagnostics and integration logs. Avoid treating a single timestamp as a universal heartbeat. Ecowitt’s polling coordinator source includes cached readings during transient failures and receiver-identity checks. Exact behavior depends on the installed version.
If replacing a gateway or switching integrations, record entity references used by dashboards and automations first. Do not assume the replacement preserves every identifier. A factory reset is not a sensible first response to a wrong IP address; follow model-specific recovery guidance only when justified.
What happens without internet?
Local delivery avoids a cloud server in the weather-data path. Continued operation during an internet outage still depends on powered sensors, receiver, network, Home Assistant and any local controlled device. Remote notifications and optional cloud services can fail independently. This is an architecture-based expectation, not an outage test we performed.
Use freshness checks and manual overrides before allowing weather readings to control equipment. A local measurement is not an official forecast, and an automation is not a guaranteed safety warning. If readings seem physically implausible despite a healthy connection, review sensor siting rather than repeatedly rebuilding the integration.
Buy only the hardware you are missing
An existing compatible receiver may already be enough. Do not buy a gateway because the app says “no entities” until you have checked the path above.
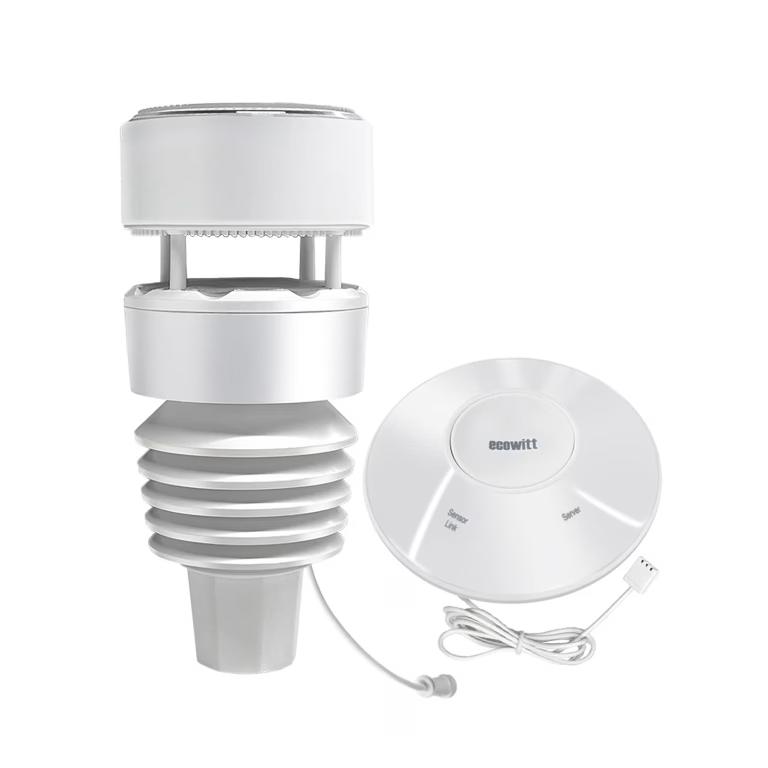
For a US buyer who needs both gateway and outdoor array, the GW2001 915 MHz kit contains GW2000 and standard WS90, without a conventional display. Confirm matching radio frequency before adding existing sensors. You still need a Home Assistant host, suitable power and mounting. WS90’s haptic rainfall measurement has documented limitations; local connectivity does not remove them. Manufacturer package and limitations
Check the Ecowitt GW2001 915 MHz kit on Amazon (paid link). Select the complete GW2001BU package, not the adjacent sensor-only or display-package option. This is the standard RF arrangement, not WS90 Powered by Shelly.
For broader ecosystem choices, return to the Home Automation guide. For an existing Ecowitt installation, identifying the receiver and direction of communication is the more useful next step.