
To connect an AcuRite weather station to Wi-Fi, first check the indoor display model number. Some displays use a temporary AcuRite Wi-Fi network and a browser; newer Bluetooth-enabled displays use the AcuRite NOW app. AcuRite Access connects by Ethernet, and PC Connect uses a computer and USB.
An internet connection is needed for online sharing, not simply to read measurements on a compatible local display. Pairing the outdoor sensor with the display is a separate connection. This guide preserves the older browser setup method and points you to the appropriate route for your hardware. The instructions are based on manufacturer documentation, not hands-on testing.
First, identify your connection method
Check the label on the back of the display or inside its battery compartment. “Iris,” “Atlas” or “5-in-1” alone does not identify the connection method; the display and bundle can have different model numbers.
Legacy browser setup — Weather Underground-only displays: 01202M, 01530M, 06086M/01540M and 06088M/01208M Start with the browser setup prerequisites and steps. AcuRite lists these separately from its My AcuRite-compatible displays. Check the manufacturer’s model list.
Legacy direct-to-Wi-Fi displays: Iris 06100M/01544MCB and 06103M/01547M, plus Atlas 06099M/01001M, Use the legacy Iris/Atlas setup and account steps, including the correct setup-mode control. Compare your display with AcuRite’s list.
Current Bluetooth-assisted setup — Optimus 06188M, 06189M or 06190M: go directly to AcuRite NOW setup. Legacy connection devices: choose Access (Ethernet), PC Connect (USB/computer) or smartHUB/old internet bridge.
Legacy browser setup: before you begin
The next two sections retain the browser-based setup for the Weather Underground-only models listed above. Compatible legacy direct-to-Wi-Fi displays use a similar local page, but follow their separate setup-mode and account instructions below. Do not apply these steps to every AcuRite display.
Let’s take a look at the steps you need to take before you can connect your AcuRite weather station to your home WiFi.
Step 1
Using the instructions in the user manual, pair your weather station and your display, and confirm that the display is maintaining four bars of signal strength. You should also ensure that it is receiving current data.
Step 2
Ensure that your display unit is connected with the power adapter that comes with your weather station. If you are only using backup batteries, you won’t have access to this feature.
If you can, we suggest that you make sure that you have installed backup batteries.
Step 3
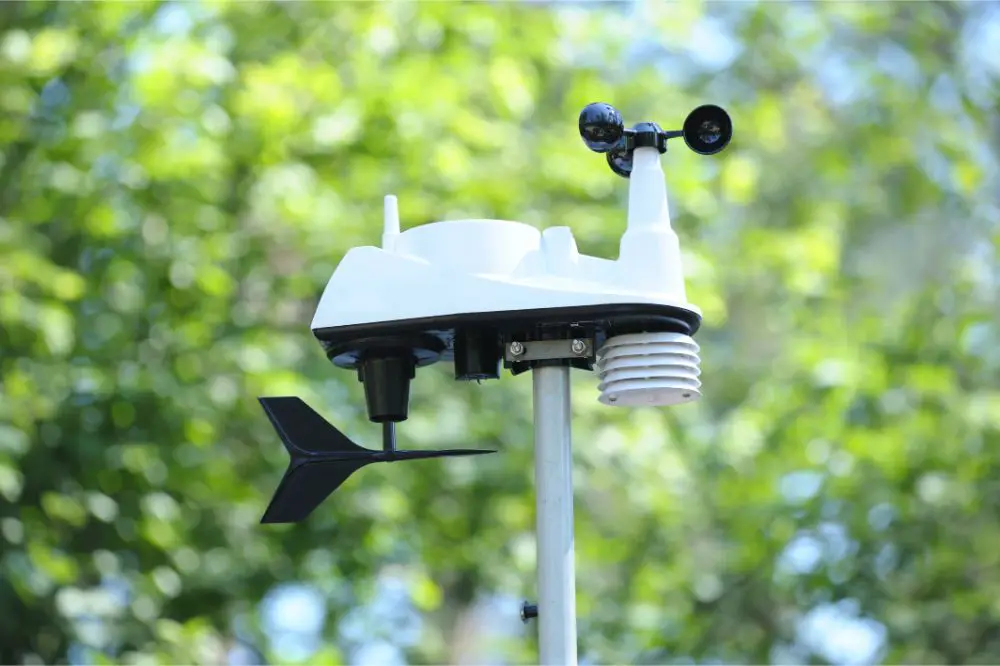
Next, you’ll want to find a suitable area to mount your outdoor sensor. After you have done this, remove the rain gauge stabilizer from the sensor. You’ll need to make sure that your router has DHCP enabled – this setting is usually enabled by default, but you can’t be too thorough.
Step 4
These Wi-Fi displays require a 2.4 GHz network. A 5 GHz-only network is not suitable. AcuRite lists WPA2-AES personal security among supported settings. If your router is configured for WPA3-only security, check its compatible 2.4 GHz/WPA2 option; do not leave the network open to make setup work.
Step 5
Have your home Wi-Fi network name (SSID) and Wi-Fi password ready. For Weather Underground uploads, create or sign into your Weather Underground account and use its Add New Device option.
Choose the appropriate hardware device under the ‘Personal Weather Station’ section, and then enter the information as prompted. After you have created your station, you are going to receive a Station Key and a Station ID.
These are important, and you’ll want to have them ready – they are also case-sensitive.
Copy the Station ID and Station Key exactly rather than guessing similar-looking characters such as “3”, “B” and “8”. The Station Key is not your Weather Underground account login password.
The same goes for ‘D’, ‘O’, and ‘0’ (zero).
Likewise, with ‘I’, ‘l’ (a lower-case ‘L’), and ‘1’.
Step 6
Have http://192.168.4.1 ready in your browser’s address bar. Open it only after joining the display’s temporary Wi-Fi network in the next section. This is the display’s local setup page, not a public website or your router’s settings page.
Legacy setup: Weather Underground-only displays
Use this procedure for the Weather Underground-only displays identified above. It follows AcuRite’s model-specific setup guidance. A phone, tablet or Wi-Fi-enabled computer can be used.
Step 1
From your Wi-Fi-enabled computer, tablet or smartphone, open up your Network window and click on the Model Number of your AcuRite Weather Display.
For the Weather Underground-only models listed above: if the display network does not appear, AcuRite instructs owners to hold the RESET button inside the display’s battery compartment for 10 seconds. You will need to enter the date and time again. This is not a universal AcuRite reset: legacy direct-to-Wi-Fi and Optimus displays use the setup-mode controls described below.
Step 2
On Windows, once you have clicked on the AcuRite WiFi Display Model Number, you will want to check the box that reads ‘Connect automatically.’ After that, click the Connect button.
This is going to disconnect your device or computer from your internet, and the weather station’s network might also read ‘No Internet’.
Step 3
After 20 seconds, go back to your browser (where you typed ‘http://192.168.4.1’) and press enter.
Step 4
After your weather station’s display settings website is open, choose the name of your WiFi network from the dropdown box on the screen. If you have a 5GHz and a 2.4GHz, make sure that you choose the 2.4GHz on this screen.
Enter your home Wi-Fi password in the Wi-Fi password field, and the Weather Underground Station ID and Station Key in their separate fields. Click Save. If the local page will not open before you can save, disconnect from the display, try another browser, reconnect to the display network and retry the HTTP address after about 20 seconds.
Connect your display using your Network window and wait half a minute once more before you press enter on your browser. If you are seeing an error message that reads ‘This site can’t be reached’, ensure that you are not connected to your home’s WiFi network and are still connected to the AcuRite network.
If your device reconnects to your WiFi network automatically before you have the chance to reach the AcuRite WiFi display settings site, have your device forget your WiFi network so that it will not disconnect from the AcuRite network again.
Step 5: Verify the upload
Reconnect your phone or computer to your home network after saving. Check the display’s Wi-Fi indicator and the timestamp of its online readings. AcuRite recommends allowing at least 20 minutes for a Weather Underground-only station to appear online. If local readings are current but the website is not, check the upload credentials before resetting the sensor.
Legacy setup: Iris and Atlas direct-to-Wi-Fi displays
For supported Iris displays such as 06100M and 06103M, press and release GEAR or SET to reopen setup. For Atlas 06099M, open the main menu and choose Connections → Wi-Fi Setup. This makes the setup network available for another 30 minutes. Do not substitute the Weather Underground-only ten-second reset. Manufacturer’s direct-to-Wi-Fi instructions.
AcuRite NOW also provides a legacy route: choose + → Add Device → Add MyAcuRite Legacy Devices. Activate the display network, join it in your phone’s Wi-Fi settings, return to the app and select Input your Home Wi-Fi Credentials. Complete the local settings page, save, and reconnect the phone to home Wi-Fi. Follow the illustrated legacy setup guide.
Connecting to Wi-Fi and adding the device to your account are separate steps. The current legacy-display account guide asks for the last six digits of the display’s 12-digit Device ID. Then link the available sensor so its readings appear. Do not confuse that Device ID with a Weather Underground Station ID.
For Atlas 06099M, “Wi-Fi NOT SETUP” means setup is incomplete or unsuccessful; a red X after setup indicates a lost Wi-Fi connection. Recheck reception and credentials. A browser timeout after Save can also occur during a firmware update: check the display and app before assuming the setup failed.
Current setup: Optimus with AcuRite NOW and Bluetooth
For Optimus displays 06188M, 06189M and 06190M, use AcuRite’s Bluetooth-assisted setup. Pair the sensor first, enable Bluetooth on the phone and open AcuRite NOW. Sign in, choose + → Add Device, wait for the display to be discovered and tap Add. Choose your 2.4 GHz home network, enter its password, then finish with Next and Done.
If discovery mode has expired after 30 minutes, use Menu → Connections → Wi-Fi Setup on the HD display, or press and release SET/GEAR on the LCD display. Keep Bluetooth enabled while retrying. These steps are for the listed Optimus models; a similar-looking display is not enough to establish compatibility.
Legacy connections: Access, PC Connect and smartHUB
AcuRite Access: Access connects to your router by Ethernet, not by joining Wi-Fi. Check its power, Ethernet cable and a compatible sensor’s signal. A flashing red front light indicates a network problem; a solid blue light is the normal state. Try a firmly seated cable or another router port, and check DHCP. Access network troubleshooting.
PC Connect: keep the display connected by USB to an online computer running PC Connect with weather sharing enabled. Wi-Fi on the computer does not turn the display into a direct-to-Wi-Fi model. AcuRite provides legacy PC Connect account instructions for AcuRite NOW. If uploads stop, inspect PC Connect’s data timestamp and sharing status. Its offline troubleshooting guide describes stopping sharing, disconnecting USB for one minute, reconnecting, checking credentials and restarting sharing. Allow up to ten minutes for readings to return.
Old smartHUB/internet bridge: do not confuse a smartHUB with Access. AcuRite ended smartHUB service/support on February 28, 2019. Re-entering Wi-Fi credentials cannot restore that retired manufacturer service. Identify the label and exact sensor model before considering another connection device; do not assume every hub works with every sensor.
For help identifying older station hardware, retain the AcuRite Professional Weather Center overview. Use your own display’s model number and manual to choose the connection steps.
My AcuRite versus AcuRite NOW
AcuRite is moving users to AcuRite NOW, but its migration page says My AcuRite remains available while migration and app issues are addressed. If you already have an account, follow that page’s password-reset process using the same email instead of assuming your hardware needs replacement. Older manuals may still say My AcuRite.
Weather Underground sharing is a separate check. Direct display uploads and the documented AcuRite NOW+ streaming route have different setup screens. Follow the route for your device and account; this guide does not assume a subscription is required for every legacy direct upload.
If the connection still fails
Display has no sensor readings: troubleshoot sensor power, pairing/channel settings and signal reception using that model’s manual first. A Wi-Fi password change cannot repair the separate sensor-to-display radio link.
Wi-Fi changed after a new router or password: reactivate the correct setup mode and save the new 2.4 GHz network details. Check that router access controls allow the device. On managed networks, ask the administrator to check required outbound access; opening the local setup page does not require exposing it to the internet.
Display is online but the app is empty: confirm the correct account, Device ID and linked sensor before deleting anything. If only Weather Underground is offline, recheck its Station ID and Station Key. Record your display/sensor model numbers and the exact error before contacting AcuRite support.
Final Thoughts
Start with the display model number, then test each connection separately: sensor to display, display or connection device to your network, and network to the online service. This keeps a recoverable setup problem from turning into an unnecessary hardware purchase.