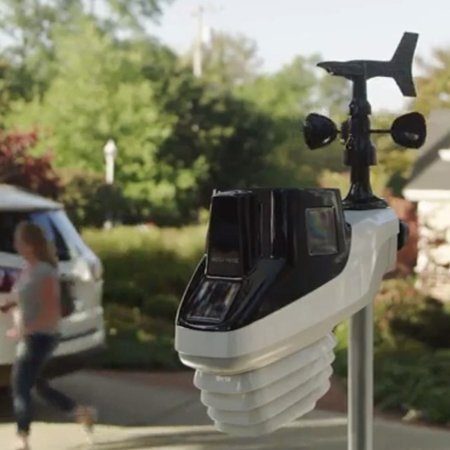
Installing your digital weather station isn’t an easy process. There are so many factors to include when deciding where, how and when to set up this device. It is important to know how location may affect the data readings coming from each sensor.
If it’s your first time setting setting up personal weather station, it’s going to be a little harder without the experience.
We’ve gone over a few tips for installing your weather sensors before on our website, but we’re going to give you more details in this article for each specific type of weather sensor.
To make it easier on you, we’ve made this guide to help you install your digital weather sensor for your weather station.
Tips for Mounting a Temperature & Humidity Sensor
There are several things to keep in mind when you’re placing or mounting a temperature or humidity sensor in your yard or on your roof.
- If you don’t have a radiation shield to protect your weather sensor from direct sunlight, it helps to set your sensor up in shade. You can also make a screen to fit your sensor in that will protect it from direct heat or other weather elements that can give you a false temperature.
- Always place your thermometer and humidity sensor on a level ground, whether it’s in your backyard or on your roof top.
- Place your sensor out of the way of any large obstructions between it and the display or console that it transmits data to.
- If you can’t avoid obstructions, make sure the sensor is far enough away from the obstruction or that it’s higher up or taller than the obstruction.
- Make sure your thermometer and humidity sensor is at least 50 feet from concrete or asphalt since they create more heat.
Tips for Mounting an Anemometer and Wind Vane
Installing anemometers and wind vanes demand precision if you want accuracy.
- That’s why it’s important to keep these tips in mind when looking for the ideal location for your anemometers and wind vanes.
- Anemometers and wind vanes should be mounted or installed as high as you can get them. Mounting them on a rooftop will give you a more accurate reading of the wind speed or wind direction.

- If you don’t feel safe mounting your anemometer and wind vane on the roof, you can use a fence pole too.
- Make sure, wherever you do plan to mount it, that it’s out of the way of big obstructions or 10 times the height of any obstructions that are between your anemometer and your display console. This way the wind and weather conditions will be more accurately recorded.
- No matter where you mount it, it should at least be at 30 feet above ground level.
Tips for Mounting a Rain Gauge
Just like placing other weather sensors from your digital weather station, where you place your rain gauge is very important.
- Just like with the other weather sensors, your rain gauge needs to be mounted at an even level. If it’s even slightly at an angle, it can affect the rainfall measurements.
- At the very least, the rain gauge should be at least 5 feet above ground level. You don’t want the rain water to splash and hit the gauge, so it should be high enough that this isn’t an issue.
- Don’t hang your rain gauge under or on a tree. This will also affect the measurement of the rainfall.
Best Mounting Poles for Your Digital Weather Sensor
Now that we’ve gone over the best practices of mounting or setting up weather station sensors outside, we’re going to share our favorite mounting poles.
This mounting kits will make your life easier when it comes to setting up your weather sensor. Ambient stands out from all other brands when it comes to mounting kits made just for these sensors.
Ambient Weather EZ-30-12 Stable Mounting Kit with Mast

- This Ambient Weather EZ-30-12 Mounting Kit supports other brands of weather stations too, including Davis and La Crosse.
- Included is 2 12 inch horizontal mounting brackets, a support bracket, and a mast.
- The mounting brackets are constructed of rust-proof steel tubing and galvanized with a polymer to protect it from corrosion over time.
- This kit is made in the United States of America.
For more pricing information, click on this link.
AcuRite 06055M Mounting Tripod for Environmental Sensors
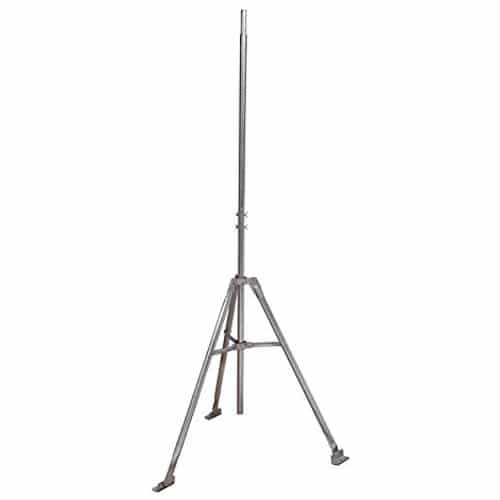
- This AcuRite 06055M Mounting Tripod is made for any AcuRite 3-in-1 or 5-in-1 weather sensors.
- This tripod is made of galvanized steel so it’ll stand up against weather elements.
- It has adjustable feet so it’s easy to set up on both roofs and level ground.
For more pricing information, click on this link.
Ambient Weather WeatherMount Weather Station Mount
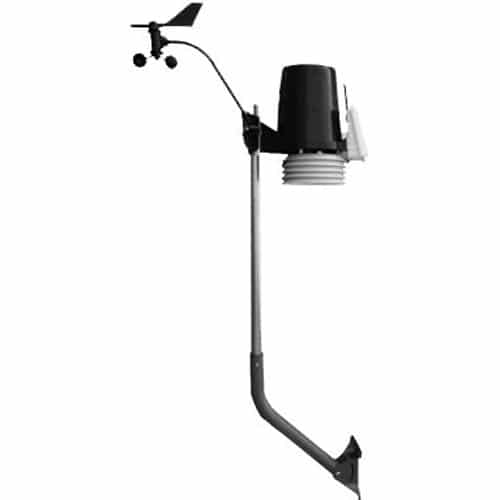
- The Ambient Weather WeatherMount Mounting Kit works with most weather station sensors, including Davis Instruments and Oregon Specific.
- It has a height of 50 inches, including the mast.
- It’s made from galvanized steel making it strong and durable to survive the different weather elements. It is also coated with a rust-proof coating.
- This mount has a small mounting plate footprint so it can be installed in difficult locations. It can also be adjusted so it fits on any roof type.
For more pricing information, click on this link.
CeKay Adjustable Universal Mounting Pole and Mounting Brackets
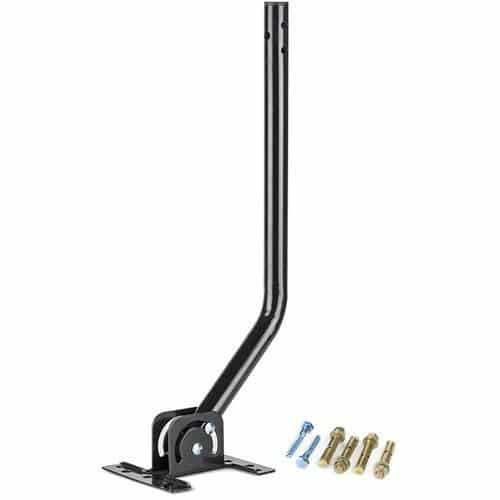
- CeKay’s Adjustable Universal Mounting Kit is made to fit most weather station sensors.
- The total height of this mounting pole is 16.5 inches and the width of the pole is 0.07 inches.
- It’s designed to be reversible so both ends of the mounting pole can be used.
- This mounting pole is adjustable. You can rotate it 60 degrees as needed.
- It’s super easy to install. Plus, it comes with all the screws and plastic anchors that you need to set it up.
- It comes with a 1 year warranty.
For more pricing information, click on this link.
The Bottom Line
It doesn’t have to be a headache to find the perfect location for your weather sensors. We hope this guide helps you find the optimal spot.
