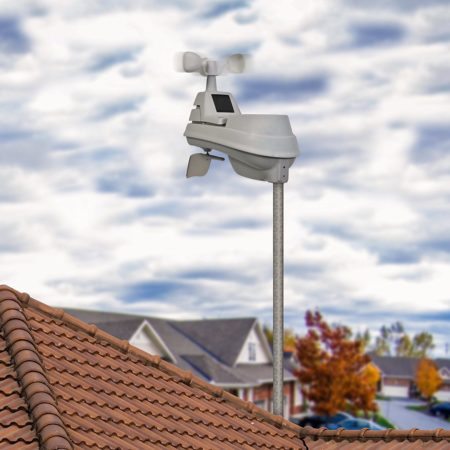
Buying a personal weather station can be a good investment. But, sometimes “easy to install” may not be so easy. And, despite a manufacturer’s best efforts, some people need some extra help.
Visual learners can watch videos online or users can read the manual. However, for anyone seeking tips in one place this the place to find them. This article seeks to demystify weather station setup and installation. Check out these basic tips to install most weather stations and optimize the weather station owner experience. Before choosing a mounting spot, use our quick sensor placement checklist to review the key siting considerations.
Installing The Weather Station
A home weather station can provide useful local observations, but setup alone does not guarantee accurate readings. Follow your exact model’s mounting, orientation and power instructions. Combined arrays require compromises because wind, temperature and rain sensors have different ideal exposures.
Temperature
Poor exposure can bias temperature readings, but it is not the only possible cause of an unexpected reading. Check the sensor’s specifications and condition as well as its location.
Use Radiation Shielding And Ventilation
Use the sensor’s designed radiation shield, or a compatible ventilated shield for a separate sensor. Shade alone does not prevent heat from nearby walls or surfaces affecting a reading. Do not shade an entire array that needs sunlight for solar power or an unobstructed rain collector.
Setup On The Roof
A roof can heat the air around a temperature sensor; mounting it 5 feet above the roof does not guarantee representative readings. Prefer a suitable ground-level site where practical. If rooftop installation is necessary, follow the model’s instructions and account for roof heat, turbulence and safe maintenance access.
Setup In The Grass
For a separate shielded temperature/humidity sensor, roughly 4–6 feet above representative grass or natural ground is a useful reference target. Keep airflow open around it. This reflects NWS cooperative-observer guidance; a combined array may need a different manufacturer-specified compromise.
Setup Near Paved Surfaces
Pavement can introduce a warm bias. Maximize practical separation from it and other artificial heat sources. NWS cooperative-observer guidance uses 100 feet from paving as a program target, not a universal minimum for every residential installation.
If space is limited, choose the most representative location available and record the compromise. A fence or pole does not by itself remove heat bias; shielding, airflow and the surroundings still matter.
Using A Radiation Shield
A radiation shield limits radiative heating while allowing air to reach the sensor; it does not protect against every temperature extreme or correct a poor site. Follow its assembly and placement instructions. The Davis shield manual illustrates why airflow and exposure matter.
Naturally ventilated shields rely on ambient airflow. Fan-aspirated designs move air past the sensor and can reduce radiation-related heating when natural airflow is weak. Use a design appropriate for the sensor, and maintain any fan and its power supply as instructed.
Do not assume an aluminum sheet placed 6 inches from a thermometer is equivalent to a designed radiation shield. That workaround has no verified performance basis here. Use a purpose-built, ventilated shield suitable for the sensor instead.
Humidity
Humidity readings describe the air at the sensor. Nearby irrigation, pools, wet vegetation or exhaust can make that location unrepresentative of the area you intend to monitor. Choose representative exposure with suitable shielding and airflow; there is no universal 50-foot clearance from every tree or body of water.
Rain Collector
Keep the rain collector level and clear of overhangs, branches, roof runoff, splash and sprinklers. Plan access for cleaning. A fixed 5-foot clearance is not enough to judge every site: obstruction height and the direction of incoming rain also matter.
Avoid both blocked rainfall and excessive wind exposure, which can cause undercatch. CoCoRaHS guidance for a separate manual gauge balances wind protection with clearance from obstructions. Follow the exact manufacturer’s instructions for an automatic collector or combined array rather than applying one clearance rule to all gauges.
Wind Speed And Direction
Buildings and trees can shelter a wind sensor or create turbulence. Reference exposure is about 33 feet (10 metres) above ground, ideally with horizontal clearance of ten times obstruction height. These are targets in NWS-hosted CWOP guidance, not mandatory heights for every homeowner.
Plan Safe Wind-Sensor Exposure
A rooftop is not automatically the best location. Follow the model’s roof-clearance and orientation instructions, and choose a safe, exposed compromise if ideal siting is impractical. Roof and obstruction clearances must be tied to the particular model. Record mounting height and nearby obstacles when comparing readings with other stations.
Other Tips
Sometimes the unit manual doesn’t cover everything. In that case, here are the answers to some other frequently asked questions regarding weather station set up.
What To Do If There Is No Post To Mount Weather Station?
Compatible tripods, poles and arm mounts can provide mounting options, but the support and attachment must suit the equipment and site. Keep masts away from power lines and plan safe access. Use qualified help for uncertain structural, roofing, grounding or electrical work. NWS lightning guidance says to stop outdoor work and seek shelter when thunder is heard.
In addition, a trip to the hardware store may also yield materials to DIY a mount or tripod but because this requires some construction or assembly experience, it may not be a popular option. However, it may be cheaper than buying a pre-made one.
Does The Ground Underneath The Station Matter?
The surface beneath a temperature sensor affects what it measures. Representative natural ground is generally preferable to hot paving or roofing. Use the separate-sensor height guidance above where applicable; do not apply it automatically to an entire combined array.
How Close Does The Station Need To Be To The Receiver?
Check the exact model’s radio range and cable limits before buying or mounting. Walls, trees, terrain and interference can reduce wireless reception. Test the powered sensor and receiver in their intended locations before permanent installation; sensor-to-receiver radio range is separate from any Wi-Fi or internet connection.
How To Maintain The Weather Station
Regular maintenance helps reduce avoidable errors but cannot guarantee accuracy. Follow the model’s instructions for cleaning sensor housings and shields, and for dealing with snow or ice; avoid damaging sensing elements. Our AcuRite reset guide covers a separate troubleshooting task, not routine cleaning.
Inspect the wind sensor on the manufacturer’s schedule and after conditions likely to cause damage or blockage. Check cups and vanes for free movement only where fitted; ultrasonic sensors have no rotating cups. Do not lubricate unless the exact manual instructs it—for example, the Davis Pro2 sensor-suite manual prohibits lubricating its anemometer shafts or bearings.
Lastly, check out the collector and bucket for dirt, debris, and insects. Clean them out gently as needed.
Conclusion
Owning and monitoring a personal weather station can be a rewarding experience. The weather reports received from a home station are relevant to the user and it may make planning daily activities easier to do.
Setting up sensors can be challenging when a yard has limited suitable space. Choose a safe, practical installation, document its limitations and compare readings taken under similar conditions. Careful installation reduces avoidable errors; it does not guarantee reference-quality results.
Lastly, the tips in this article are meant to be a general overview of all weather stations. But, stations may vary by manufacturer so it’s always best to consult with the enclosed weather station manual when in doubt.